The setup process of any extender consists of a connection process and the configuration process. A user can perform the Dlink Extender setup process by three methods. If you want a wireless connection setup process, you can either go for the Wi-fi setup process or can take the help of a WPS connection method. If a user wants a wired connection setup process he can set up his Dlink range extender through the web browser method. Users who are setting up their extender for the first time are recommended to take the help of the documentation that comes along with the Extender device.
Note: Before performing the setup process, users are recommended to read the Wi-Fi configuration card that comes along with the Range extender. Note down the default Wireless credentials somewhere that a user needs when the first time he connects the Range Extender to the computer or a mobile device.
Steps to Dlink Range Extender setup
- Go and Power on the Range Extender by connecting it directly to an electric outlet available near your main router.
- You will notice that the Power LED will be red at first then start to flash amber when your extender gets successfully turned on.
- Go and move over to the computer. Go to the Wi-Fi list and start scanning for the available Wi-Fi networks.
- The available devices will get showed up on your Wi-Fi list, select the default Network Name and connect to it. If your extender is a dual-band extender, the list will show two network names one is of 2.5 GHz and the second one is of 5 GHz network.
- Type the default Wi-Fi password given on the product label of your device then click on the Connect button.
- Now, open a web browser on your computer and type www.dlinkap.local on the web address of your browser. Hit the enter button and you will be redirected to the setup wizard of your Dlink Range Extender. A user can also type the LAN IP address of the Dlink Range extender on the web address bar of a browser. The IP address of a Dlink Extender is 192.168.0.50.
Note: In some cases when a user gets successfully connected, the setup wizard of the Dlink Range extender automatically appears on your screen.
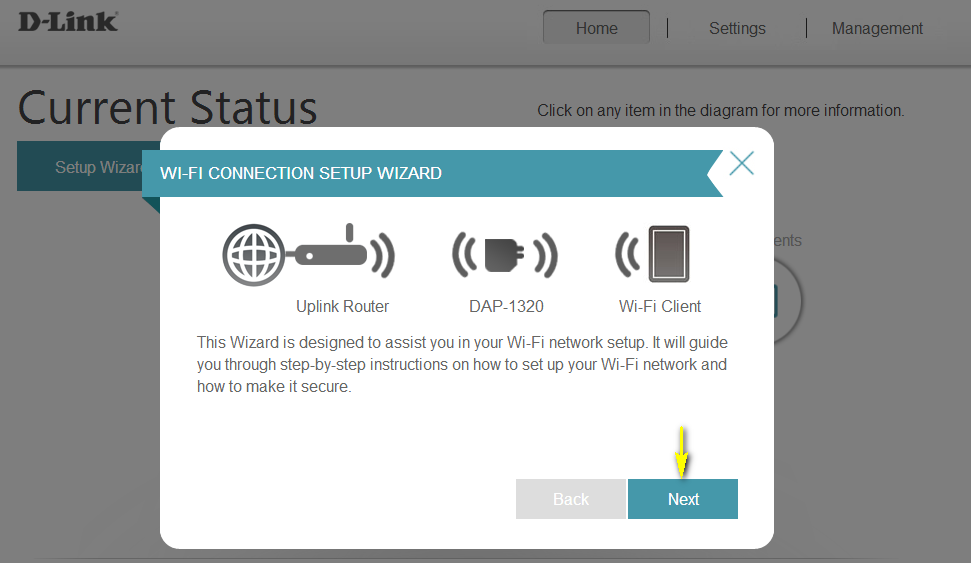
Steps to configure the Dlink Range Extender in your home network
- From the main setup page, select the language that you want to prefer in the configuration process. English will be selected as the default language on the menu list of the setup Wizard.
- Click on the Next button to start the configuration process.
- Click on Extend the existing wireless network, the extender will start the scanning process to scan for available Wi-Fi networks.
- Once the scanning process gets completed, go and select your home Wi-Fi network through the list that appears on your screen.
- You will be prompted to type the Wi-Fi password of your local network then click on the Next button. Make sure that the Password characters are between 8 and 63.
- Now you can personalize the SSID name of your extended network. Experts recommend providing different names to each of the frequency band Network names so that you come to know which network you are connected to.
- You can also change the Wi-fi password by typing a new desired Network key on the Wi-Fi password field.
- After assigning both the Wireless credentials to your extended network, go ahead and click on the Next button.
- Assign the admin password of the Dlink extender login window in the next window to avoid anonymous users away from interrupting your Wi-Fi network.
- Click on the Next tab and the summary of the settings that you configured appears on your screen.
- When you are done reviewing all the settings you configured, click on the Finish tab and the extender will start the reboot process to apply the settings you configured.
- Close the current browser and go-ahead to connect to your extender through the Wi-fi list by typing the credentials that you mention during the configuration process of the dlinkap.local device.
Why my Dlink Wi-Fi range Extender is not connecting to a router through the WPS connection?
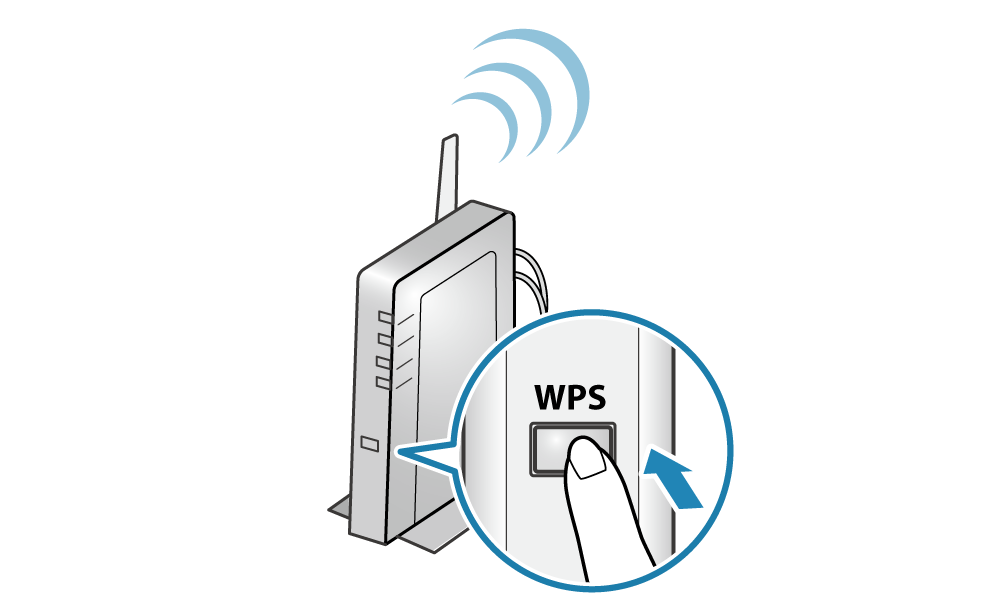
WPS (Wi-Fi Protected Setup) connection is a type of a wireless conneciton where a user uses the Wi-Fi signals to connect his extender to a router. It is wireless connection that is done conveniently by the WPS button that should be located on both the networking devices. After connecting your extender to a router through WPS connnection method, you can connect your configure your Range extender either through a web browser or through a Dlink app.
Here are the conditions that should be met before connecting an extender to a router through a WPS connection
- If you want to connect your extender to a router through a WPS connection, make sure your router also carry a WPS button located on the real panel of your device. WPS connection would not be possible if your router doesn’t have the WPS button.
- After pressing the WPS button on your Wi-Fi range extender, make sure to press the WPS button within 2 minutes otherwise the connection won’t get established.
- Keep your router within the WPS (Wi-Fi Protected setup) range so that it would be easy for extender to get connected to your router. Any distance greater than the normal range will weaken the connection and in worst case scenarios may disconnect your extender from your router.
- Before connecting your extender to a router, make sure there are no obligations present between both the networking device that may affect the connection process between your range extender and the router. Keep the Wi-Fi devices, reflecting surfaces, metallic objects, machinery, electronic devices, and gadgets.
Note: Once the WPS connection gets established between your extender and the router, the LED on your extender starts to blink green. The LED on your router after the successful connection process will stop flashing and turns green. The process of changing the flashing light into solid green may take 3 to 4 minutes.