WPS is a (Wi-fi Protected setup) connection that allows a user to join the Wi-fi network of a device without typing the wireless credentials in the provided fields. It is one of the easiest methods to connect to a range extender that most of the user applies during the setup process. To connect your extender to a router through a WPS connection, your router must be a WPS-enabled device. Make sure your router has a WPS button on its front panel before proceeding to the Netgear Extender setup process.
Steps to setup your Netgear Extender through the WPS connection
- Unbox your Netgear extender along with a configuration card and other accessories.
- Look for an available power switch near your main router. Make sure your extender is in the same room as your Wi-fi router is. The distance between them should be enough to create a powerful signal.
- Power on your range extender by plugging it directly into the power outlet.
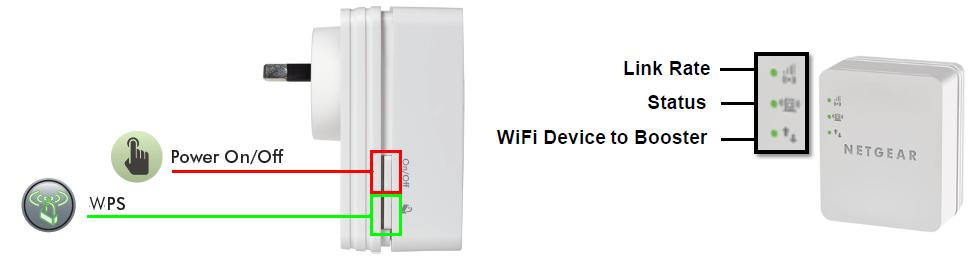
- Turn on the power switch and wait for a few seconds to allow your range extender to get turned on. When the Power LED of your range extender turns amber or solid green, it means your range extender has successfully turned on.
- If the Power LED of your range extender doesn’t light, press the Power button provided on your range extender and then check whether it has turned on or not.
- When your range extender has successfully turned on, you need to start the WPS connection process.
- To start the WPS connection process, press the WPS button on your range extender and the WPS LED on your device starts blinking.
- Now, within 120 seconds, press the WPS button on your router with which you want to connect your range extender.
- When the extender gets connected to your Wi-fi network, the WPS LED on your range extender turns solid white and the Link Status LED will turn green. If the LED doesn’t lit, troubleshoot the issue then go further to the next step.
- If your extender is dual-band, you need to reattempt the former step to connect your 5GHz band.
- When both of your frequency bands get connected, you need to unplug the extender and relocate it to a location where you want to place it. The recommended distance is halfway between your router and the dead Wi-fi zone where you want to access the Internet.
- You can also use the Signal LED of your range extender to determine an optimal spot to fetch a strong amount of Wi-fi signals.
- If the Status LED is red, it means the signals are not enough and you need to move your extender closer to the router. If the Status LED turns amber or white it means the signals are good and your range extender is in a good spot.
- Now, take your computer or Wi-fi enable device in the poor range where you want the Internet bandwidth.
- Connect your computer to the extended network by using the same Wi-fi network settings as your main router.
Note: If your extended network and the router with which you have connected the extender share the same Wireless settings, only one Network Name will be broadcasted on the Wi-fi signals tab. Before performing the extender setup process through the WPS connection, make sure your router is supportable for the WPS connection. If your router doesn’t have the WPS button, you won’t be able to connect your router to the extender through the WPS connection method.