How to setup a Dlink DiR-655 router ?
By using the correct connection process and by strictly following all the guidelines during the configuration process, a user can successfully set up a Dlink DIR-655 router in his home network. You can check the Quick Setup guide to take help during the process and can also visit the official support website of Dlink to resolve an issue.
Here are the steps to set up a Dlink DIR-655 router
- To start the setup process, plug in the power cable and modem cable to the Internet port.
- Now, use an Ethernet cable to connect your PC to one of the Ethernet Gigabit ports on your router.
- Wait for a couple of seconds to turn the Power LED from orange to blue, which signifies your router has successfully turned on.
Note: Another LED that looks like a globe will turn blue when the Internet is active and will turn orange when the Internet is inactive.
- If you are using a wireless connection, use the default Wi-fi name to connect to your router’s network.
- Open the Wi-fi list and scan for the available Wi-fi networks nearby. Select the “Dlink” name and connect to it.
- Once you are connected, open a web browser on your computer to perform the Internet configuration of your network.
- Type dlinkrouter.local on the address bar of a browser and hit the enter button. You can also type the IP address of a Dlink router on the address bar i.e 192.168.0.1
- It will take you to the router configuration page. Type “admin” as the username and leave the password field blank. Click on the Login button.
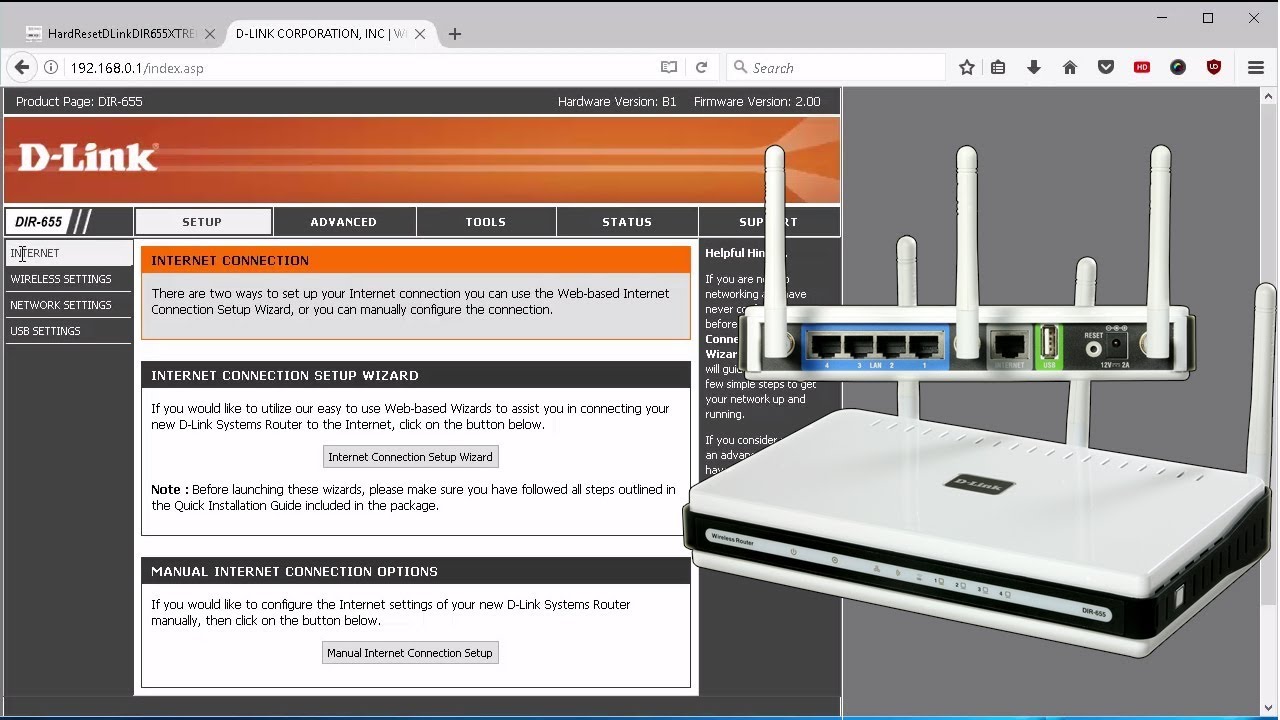
- To configure your connection, choose the Setup tab from the topmost menu bar then click on the “Internet connection setup wizard” option.
- Set a login password for the Dlink router login window. Assign a desired passphrase on the password field and retype it on the Verify password field.
Note: Make sure you do not provide the login password the same as the wireless password.
- Click on the Next button. In the next window choose your Time Zone where you are operating the Dlink DIR-655 router.
- Now, you need to configure your Internet connection. Select the PPPoE Internet connection method. You can confirm the ISP of your network before selecting the Internet connection type.
- Click on the Next tab.
- In the next window, you need to enter the username and password, the details of which you will receive from your Internet Service Provider.
- Click on the Next button when you are done configuring the network details.
- On the following screen, click on the Connect button to save the settings and your router starts the reboot process to imply the configurations you made.
- When the setup process is done, your Internet connection will be ready.
Note: Before the setup process, make sure you have already fetched the Internet connection details from your Internet Service Provider. You can contact the ISP of your network from the bottom of the Network settings page of the dlinkrouter.local window.
Dlink DIR-655 login – How to perform the Dlink DIR-655 firmware update?
The firmware of a router must be updated when a new firmware for your Dlink DIR-665 router is available. New firmware is responsible for adding new features and upgrading the existing ones in your Dlink router. Firmware update enhances the functionality of your router and provides robust Wi-fi speed to your network.
Steps to setup a Dlink DIR-655 Firmware update through a manual method
- Visit the support.dlink.ca website to download the latest firmware for your Dlink router.
- If the downloaded firmware file is in a zip format, please extract the file using the Windows extractor or WinRAR.
- Now, open a browser and type dlinkrouter.local on its address bar. You can also type LAN IP address as the URL of a browser.
- Hit the enter button and you will be redirected to the Dlink router login page.
- Type “admin” on the username field and enter the password you assigned during the setup password. If you haven’t changed the default password, keep the password field blank.
- Click on the login button and the dlinkrouter.local page appears on the screen.
- From the main navigation panel, click on the Tools tab then click on the Firmware update option located on the left-hand side.
- Scroll down the page and locate the Browse button.
- Click on the Browse button and take your cursor to the location where you have kept your downloaded file.
- Select the downloaded file and click on the Upload button to initiate the firmware update process.
- The process will take 3 to 4 minutes to complete. When the process gets completed, your router automatically reboots.
- The firmware should now be upgraded.
Note: Users are recommended to avoid any kind of interruption during the update as it may lead to failure of the Firmware update process. A wireless connection must be avoided as there is a huge probability that your router may disconnect during the upgrade process.